Uncategorized
How To Launch Your Jewelry Business In 30 Days
Apr
You don’t need a trust fund, a fully equipped studio, or years of goldsmithing school to start making money with jewelry. What you need is a plan, a little courage, and the next 30 days. This roadmap will walk you through every essential step — from setting up your first workspace to making your very first sale — with a starting budget of just $50 to $150.
The jewelry industry is one of the most accessible creative markets in the world. Handmade pieces carry emotional value that mass-produced products simply can’t replicate, and customers are actively seeking out artists and makers just like you. Whether you’re drawn to wire-wrapping, resin casting, beaded designs, polymer clay, or simple metalwork, there is a paying audience waiting for what your hands can create.
This guide is structured around your first 30 days — not as an overwhelming checklist, but as a genuine week-by-week roadmap that builds momentum, confidence, and real results. Let’s get started.
Why Jewelry Is One of the Best Side Hustles to Start Right Now
Before we dive into the practical steps, it’s worth taking a moment to appreciate just how well-suited jewelry making is for a side hustle. Unlike many creative businesses, jewelry has some extraordinary advantages:
Low barrier to entry. You don’t need a storefront, a warehouse, or expensive machinery to get started. Many successful jewelry makers launched from their kitchen table with less than $100 in supplies.
High perceived value. A pair of earrings that costs $4 in materials can sell for $25–$45. A simple wire-wrapped pendant costing $6 to make can retail for $35–$60. The margin potential in handmade jewelry is genuinely exciting.
Scalable creativity. As your skills grow, so does your product range. You can start with simple designs and gradually introduce more complex, higher-priced pieces without needing to reinvent your business.
Evergreen demand. People buy jewelry for birthdays, anniversaries, graduations, weddings, holidays, and simply because they love how something looks. There’s no slow season — only seasons with different themes.
Community and support. The handmade jewelry world is filled with generous makers, online tutorials, and communities willing to share tips. You will never feel like you’re figuring it out alone.
Now, let’s build your roadmap.
Week 1: Foundation — Budget, Niche, and Supplies
Setting Your Starting Budget
One of the most paralyzing myths about starting a creative business is that you need a lot of money upfront. You don’t. With $50–$150, you can build a legitimate starting inventory, set up a functional workspace, and launch your first sales channel. The key is strategic allocation.
Here’s a breakdown of how to think about your budget across three realistic starting points:
| Budget Tier | Supplies & Materials | Tools | Packaging | Platform/Listing Fees |
|---|---|---|---|---|
| $50 Starter | $25 | $10 (basics only) | $8 | $7 |
| $100 Balanced | $50 | $25 | $15 | $10 |
| $150 Growth | $70 | $40 | $25 | $15 |
The golden rule at the start: spend the minimum needed to produce five quality, sellable pieces. Reinvest your first earnings into expanding your supply kit rather than buying everything at once before you’ve made a single sale.
Choosing Your Jewelry Style (Your Niche)
Before you buy a single bead or spool of wire, take 30–60 minutes to define your style direction. This isn’t about locking yourself in forever — it’s about starting with focus so your first five designs feel cohesive rather than scattered.
Consider the following popular beginner-friendly jewelry styles and their relative startup costs:
| Style | Starter Cost | Skill Level | Avg. Selling Price | Best For |
|---|---|---|---|---|
| Beaded Jewelry | $20–$40 | Beginner | $15–$45 | Colorful, boho, layered styles |
| Wire Wrapping | $25–$50 | Beginner–Intermediate | $25–$75 | Gemstone lovers, earthy vibes |
| Resin Casting | $40–$70 | Beginner–Intermediate | $20–$60 | Abstract, colorful, modern |
| Polymer Clay | $20–$45 | Beginner | $18–$55 | Trendy, sculptural, statement pieces |
| Macramé/Knotted | $15–$30 | Beginner | $20–$50 | Boho, festival, natural styles |
Don’t overthink your choice. Pick the style that genuinely excites you the most, because that enthusiasm will come through in your work. You can always expand later.
Your Essential Tool List
Regardless of which style you choose, there’s a set of core tools that almost every jewelry maker needs. Here are the absolute essentials to prioritize in your first purchase:
- Round-nose pliers — for creating loops and curves
- Flat-nose pliers — for gripping, bending, and flattening
- Wire cutters / flush cutters — for clean cuts on wire and findings
- Beading mat or small tray — to keep tiny pieces from rolling away
- Ruler and measuring tape — for consistent sizing
- Needle and thread or beading wire — depending on your chosen style
These six items can typically be purchased as a bundled starter set for $12–$20, leaving the bulk of your budget for materials and supplies.
Week 1 (Continued): Workspace Setup
Creating Your Dedicated Making Space
One of the most underrated steps in starting any side hustle is creating a dedicated workspace. This doesn’t mean you need a spare room or a professional studio — a corner of a table, a small rolling cart, or even a large tray that you bring out each time you work is enough. What matters is that you have a consistent space that signals to your brain: this is where I create.
A good starter workspace should include the following:
A flat, well-lit surface. Natural light is best for seeing colors accurately, but a good daylight lamp ($15–$25) will serve you beautifully for evening sessions. Proper lighting also helps when you photograph your pieces.
Organized storage for your supplies. Dollar-store tackle boxes, ice cube trays, and small jars are perfect for sorting beads, findings, and wire. Organization now will save you enormous amounts of time later when you’re trying to fill orders quickly.
A comfortable chair. You’ll be spending hours at your workspace. Sit comfortably. Your back and your creativity will thank you.
A small notebook or whiteboard. Keep this next to your workspace to sketch design ideas, jot down material quantities, and track what you’ve made. It doesn’t have to be elaborate — even sticky notes work. The habit of recording is what matters.
Workspace Setup Checklist
| Item | Budget Option | Estimated Cost | Priority |
|---|---|---|---|
| Flat work surface | Kitchen/desk table | $0 (use what you have) | Essential |
| Lighting | Clip-on daylight lamp | $10–$25 | High |
| Bead/supply storage | Tackle box or ice cube trays | $3–$10 | High |
| Beading mat | Foam mat or velvet tray | $3–$8 | High |
| Design notebook | Any lined notebook | $2–$5 | Medium |
| Photo backdrop | White foam board or plain fabric | $1–$5 | Medium |
Notice that photography setup is already on the list. Even in Week 1, it’s worth setting up a simple photography corner. Your product photos are often the first and only impression a potential buyer gets of your work, and a clean, well-lit image against a simple background will outperform a blurry photo on a cluttered surface every single time.
Week 2: Creating Your First 5 Sellable Designs
This is the most exciting part — and possibly the most daunting. Week 2 is about moving from aspiration to creation. Your goal by the end of this week is to have five completed, photograph-ready, sellable jewelry pieces. Not 50. Not 20. Just five, done with care and intention.
What Makes a Piece “Sellable”?
Before you sit down to make your first piece, it helps to understand the difference between a piece you made for fun and a piece that’s ready for a paying customer. A sellable piece meets the following criteria:
- It’s structurally sound. Clasps open and close properly. Knots are secure. Wire ends are properly tucked and won’t snag. Jump rings are fully closed.
- It’s consistently sized. Earrings are a matching length. Bracelets fit a standard wrist (approximately 6.5–7.5 inches for adults). Necklace lengths are standard (16″, 18″, or 20″).
- It has a clean finish. No rough edges, excess glue, uneven resin, or visibly tangled wire.
- It’s original and intentional. Even if it’s a simple design, it should look like you meant to make it that way.
Your 5-Piece Starter Collection Strategy
Rather than making five completely different items, consider building a small, cohesive mini-collection. A themed collection of five pieces is more powerful than five random items because it shows your aesthetic, tells a visual story, and makes your shop feel curated rather than chaotic.
Here’s an example mini-collection framework using a nature-inspired theme:
| Piece # | Item Type | Example Design | Est. Material Cost | Suggested Retail |
|---|---|---|---|---|
| 1 | Stud earrings | Small pressed flower resin studs | $2–$4 | $18–$28 |
| 2 | Dangle earrings | Leaf charm with beaded drop | $3–$6 | $24–$38 |
| 3 | Pendant necklace | Wire-wrapped stone pendant on chain | $5–$9 | $32–$55 |
| 4 | Bracelet | Gemstone bead stretch bracelet | $4–$7 | $22–$38 |
| 5 | Statement piece | Layered chain necklace with charm cluster | $8–$14 | $45–$75 |
Notice the price progression: you have accessible entry-point pieces (the studs) and an aspirational statement piece. This range encourages customers to buy more than one item and gives your shop a sense of depth even with just five listings.
Pricing Your Work Fairly (and Profitably)
One of the most common mistakes new jewelry makers make is underpricing their work out of insecurity. You are an artist providing something handmade, unique, and personal. Your price should reflect that. A simple but effective pricing formula to start with is:
Retail Price = (Material Cost × 3) + (Hourly Rate × Hours Spent) + Packaging Cost
For example: if a necklace costs $6 in materials, takes you 45 minutes to make, you value your time at $15/hour, and packaging costs $1.50, your minimum retail price would be: (6 × 3) + (15 × 0.75) + 1.50 = $18 + $11.25 + $1.50 = $30.75, which you’d round to $32 or $35.
As your skills improve and you get faster, your hourly rate can increase. Never feel pressured to underprice just to compete — handmade jewelry buyers are looking for value and story, not the lowest price.
Week 3: Photography and First Sales Channel Setup
Photographing Your Pieces Like a Pro (With Your Phone)
Here’s a truth that has launched thousands of successful shops: you don’t need a professional camera to sell jewelry online. A modern smartphone camera is more than capable of producing stunning product photos — the difference lies entirely in lighting and background, not equipment.
Follow these steps for beautiful, consistent jewelry photography:
Step 1 — Set up your photo area near a window. Natural diffused light (not direct sunlight, which creates harsh shadows) is the most flattering light for jewelry. A north-facing window is ideal, but any indirect daylight will work beautifully.
Step 2 — Use a clean, simple background. A sheet of white foam board (available at dollar stores), a plain white or light grey cloth, or a marble-look adhesive paper creates a professional backdrop that keeps the focus on your jewelry.
Step 3 — Use props thoughtfully. A small piece of driftwood, a smooth river stone, a sprig of dried eucalyptus, or a folded piece of linen can make your photos look styled and editorial without distracting from the jewelry itself. Keep it to one or two simple props maximum.
Step 4 — Take multiple angles. For each piece, capture: a flat lay overhead shot, a straight-on front shot, and at least one close-up detail shot. If the piece has intricate work, a macro shot showing the detail is incredibly compelling.
Step 5 — Edit simply. Free apps like Snapseed or Lightroom Mobile are excellent for basic adjustments. Typically, a slight brightness increase and small contrast boost is all you need. Avoid heavy filters that distort the true color of your pieces.
Setting Up Your First Sales Channel
With five beautiful pieces and their photos ready, it’s time to choose where you’re going to sell. For your first 30 days, the goal is to launch on one primary channel and do it well, rather than spreading yourself thin across multiple platforms simultaneously.
Here’s an overview of the most popular starting platforms for new jewelry makers:
| Platform | Listing Fee | Transaction Fee | Built-in Audience | Best For |
|---|---|---|---|---|
| Etsy | $0.20/listing | 6.5% + payment processing | Large (90M+ buyers) | First-time sellers, immediate visibility |
| Instagram Shop | Free to set up | 5% per shipment | Depends on your following | Visual storytelling, brand building |
| Facebook Marketplace | Free | 5% or $0.40 min. | Local community reach | Local/in-person pickup, fast first sales |
| Depop | Free | 10% seller fee | Gen Z audience, fashion-focused | Trend-forward, streetwear-adjacent styles |
| Your Own Website | $10–$30/month | Payment processing only (~3%) | None (you build it) | Long-term brand ownership, higher margins |
Recommendation for your first 30 days: Start with Etsy or Facebook Marketplace. Etsy’s built-in audience means buyers are already searching for handmade jewelry, giving you a real chance of a sale even without an existing following. Facebook Marketplace, particularly when combined with local community groups, can get you your very first sale in days through word of mouth.
Writing Listings That Actually Sell
A great product photo gets the click. A great listing description closes the sale. Here are the key elements of a compelling jewelry listing:
Title: Be descriptive and searchable. Instead of “Blue Necklace,” write “Handmade Aquamarine Crystal Wire-Wrapped Pendant Necklace — Sterling Silver Chain, 18 inch.” Include the materials, style, and key features that buyers search for.
Description: Open with a short, evocative sentence that paints a picture (“This pendant captures the calm depth of a mountain lake”). Then provide the practical details: dimensions, materials, care instructions, and customization options if available.
Tags: Use all available tags and fill them with a mix of broad and specific terms. Think about what someone might actually type into a search bar when looking for a gift or a piece for themselves.
Shipping information: Be clear and realistic about processing and shipping times. Set expectations you can reliably meet — this builds trust and drives positive reviews.
Week 4: Marketing, First Sales, and Building Momentum
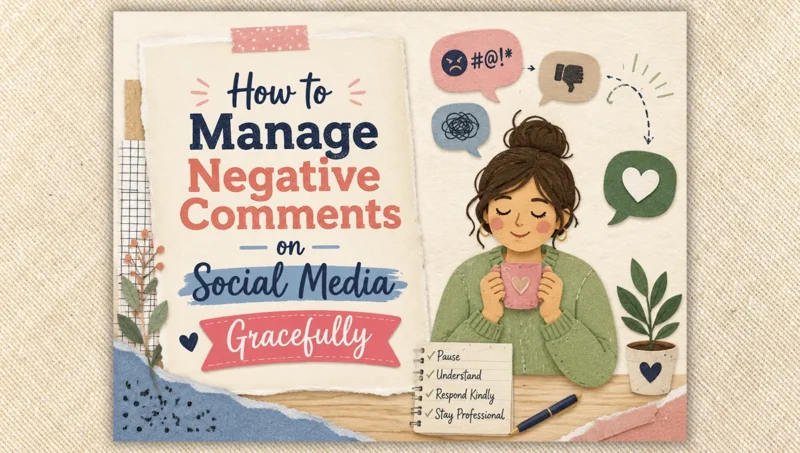
Telling Your Story on Social Media
You don’t need to be a social media expert or have thousands of followers to make your first sales. What you need is to show up consistently and authentically. The most effective social media strategy for a new jewelry maker in the first 30 days is simple: document the journey.
Post the process. Show behind-the-scenes moments of you making your pieces. Share the little victories — the first set of earrings that came out perfectly, the first listing going live, the first sale notification. People buy from people, and the more of yourself you share, the more connected potential customers feel to your work.
Here’s a simple first-month social content plan to get you started:
| Week | Content Focus | Example Post Ideas | Frequency |
|---|---|---|---|
| Week 1 | The Beginning | Why you’re starting, your workspace setup, your tools | 3 posts |
| Week 2 | The Making | Process video, “first attempt” honesty, materials flat lay | 3–4 posts |
| Week 3 | The Launch | Finished pieces, shop announcement, first listings live | 4–5 posts |
| Week 4 | The Community | Engage followers, ask for feedback, share your first sale | 4–5 posts |
Your Warm Audience: The Most Underused Resource
Before you worry about reaching strangers, remember that you already have a network of people who know and trust you. Your first customers are likely to be friends, family members, coworkers, and acquaintances — and there’s nothing wrong with that. Every great business started with someone telling people they knew about what they made.
Send a personal message (not just a blanket post) to 10–20 people in your life who might be interested or who know others who might be. Be genuine: tell them you’ve started making jewelry, share a photo, and let them know your shop is live. Ask if they’d be willing to share it. The response will surprise and encourage you.
The Power of Customer Reviews
Particularly on platforms like Etsy, reviews are the engine of growth. A single positive review from your first sale dramatically increases the likelihood of your next sale. Do everything in your power to make your first customers’ experience exceptional:
- Package your jewelry beautifully, even if simply. A small kraft paper box, a ribbon, and a handwritten thank-you note costs almost nothing and creates a memorable unboxing experience.
- Ship promptly and communicate proactively if there are any delays.
- Follow up politely after delivery to make sure everything arrived in perfect condition.
- After a few days, send a brief, friendly message asking if they’d be willing to leave a review. Most happy customers simply forget — a gentle reminder is all they need.
Packaging: Making Every Order Feel Like a Gift
Even at the very beginning, thoughtful packaging sets you apart. The unboxing moment is part of the product experience, and it’s completely within your control to make it magical — even on a shoestring budget.
| Packaging Element | Budget Option | Upgrade Option | Cost Range |
|---|---|---|---|
| Box or pouch | Kraft paper box | Branded velvet pouch | $0.30–$1.50 each |
| Tissue paper/fill | Plain white tissue paper | Colored/branded tissue | $0.05–$0.20/sheet |
| Thank-you card | Handwritten note on card stock | Printed business card/postcard | $0.05–$0.30 each |
| Care instructions | Small printed card | Folded branded booklet | $0.05–$0.20 each |
| Shipping mailer | Padded bubble mailer | Kraft mailing box | $0.40–$1.20 each |
A handwritten thank-you note is worth its weight in gold. In a world of automated emails and faceless transactions, a note that reads “Thank you so much — I hope you love this piece as much as I enjoyed making it” creates a human connection that turns a one-time buyer into a loyal repeat customer.
Tracking Your Progress: Simple Numbers That Matter
At the end of your first 30 days, you want to look back and have a clear picture of where you started, what you made, and what you earned. This doesn’t need to be complicated — a simple spreadsheet or even a notebook page tracking the following metrics is all you need:
- Total spent on supplies, tools, and packaging
- Total revenue from sales
- Number of pieces made vs. pieces sold
- Number of listings live
- Number of shop views / inquiries received
- Customer feedback or comments received
These numbers will tell you what’s working and where to focus your energy in month two. You might discover that your pendant necklaces are getting all the attention while your bracelets sit. That’s valuable information. Or you might find that your Instagram posts drive far more traffic to your shop than your listing tags. Every data point is a compass point guiding your next move.
Your 30-Day Milestone Checklist
Use this as your complete overview of everything to accomplish in your first month:
| Week | Milestone | Status |
|---|---|---|
| Week 1 | Budget allocated and supplies ordered | ☐ |
| Niche/style decided | ☐ | |
| Workspace set up with lighting and storage | ☐ | |
| Photography corner established | ☐ | |
| Week 2 | First 5 designs created and quality-checked | ☐ |
| Prices calculated using pricing formula | ☐ | |
| Product photos taken for all 5 pieces | ☐ | |
| Week 3 | Sales channel account created | ☐ |
| All 5 listings published with full descriptions and tags | ☐ | |
| Social media account created or updated | ☐ | |
| Shop announced to personal network | ☐ | |
| Week 4 | First sale made (or first serious inquiry) | ☐ |
| First order packaged and shipped beautifully | ☐ | |
| Month 1 revenue and expenses tracked | ☐ | |
| Month 2 goals written down | ☐ |
What Comes After Day 30?
If you’ve followed this roadmap, by the end of your first 30 days you will have done something most aspiring creators never do: you will have actually started. You’ll have a workspace, five pieces, live listings, and the experience of putting your work into the world for real. That is enormous, and it deserves to be celebrated.
Month two is about refinement and expansion. You’ll use what you learned in month one — which pieces got the most attention, which photos performed best, what feedback you received — to make your next five or ten pieces even more intentional. You’ll start thinking about adding more listings, exploring a second sales channel, or designing pieces around an upcoming holiday or season.
Month three is where many side hustles start to feel like real businesses. You’ll have a small but growing body of reviews, a rhythm of making and listing, and — most excitingly — repeat customers who already love what you create.
The jewelry business is one of the few creative businesses where the more love you pour in, the more financially rewarding it becomes. Customers can feel the care in a handmade piece. They can sense the intention. And they will pay for it, come back for it, and tell their friends about it.
A Final Word of Encouragement
Starting anything new is vulnerable. There will be moments in your first 30 days when you wonder if your pieces are good enough, if anyone will buy them, or if you made a silly mistake thinking you could turn your hobby into a business. Those moments are completely normal, and they visit every single entrepreneur — jewelry makers and Fortune 500 CEOs alike.
Here’s what those moments of doubt don’t know: that somewhere right now, someone is searching for exactly the kind of jewelry you make. They want something handmade, something with a story, something that feels different from what’s on every high-street rack. They don’t know your name yet — but they’re looking for you.
Your first 30 days are not about perfection. They’re about beginning. And beginning, with a plan and a little courage, is the most powerful thing you can do.
Now get making. ✨